Active Directory Penetration Dojo-Setup of AD Penetration Lab:Part 2
Posted on 26 Aug 2018 by Scarred Monk
The Prologue
Hi everyone, Welcome to the second part of the setup series on Pentest lab in AD environment. I hope your basic concepts about AD and Domain Controller are cleared at this point. If you still haven’t read the Part-1 of this series, you can read it here.
Recap to the Part 1:
- In the first post, I gave an introduction to the Active Directory including AD Domain, AD Forest, AD Domain Controller, AD Database, DNS, Group Policies etc.
- Then I created a VM with Server 2012 R2 in Oracle Virtual Box and installed ADDS Role and promoted it to the Domain Controller.
- I created a new AD Forest with root domain name “scriptdotsh.local”
- This was done via GUI as well as CLI (Powershell)
Now that we have a Domain Controller, we’ll add client machines and users into the domain. So let’s move on and grow the AD environment.
Add a computer into your Active Directory Domain!
First of all, we should know how to add a machine into the domain. After you create a new VM, go to its settings and select Host Only Network (Same adapter as DC). And power on the machine.
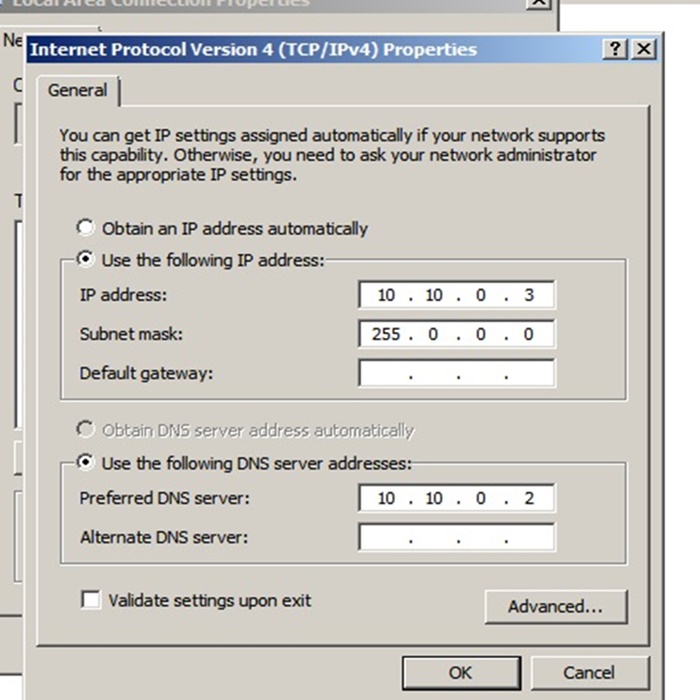
- Go to network and sharing Center. Assign a static IP to the system.
- IP Address: 10.10.0.3
- DNS Address: 10.10.0.2 (DC & DNS server)
Change the computer name
- Set a name that helps you to identify the server or computer and which server is DC, File Server, DHCP server etc.
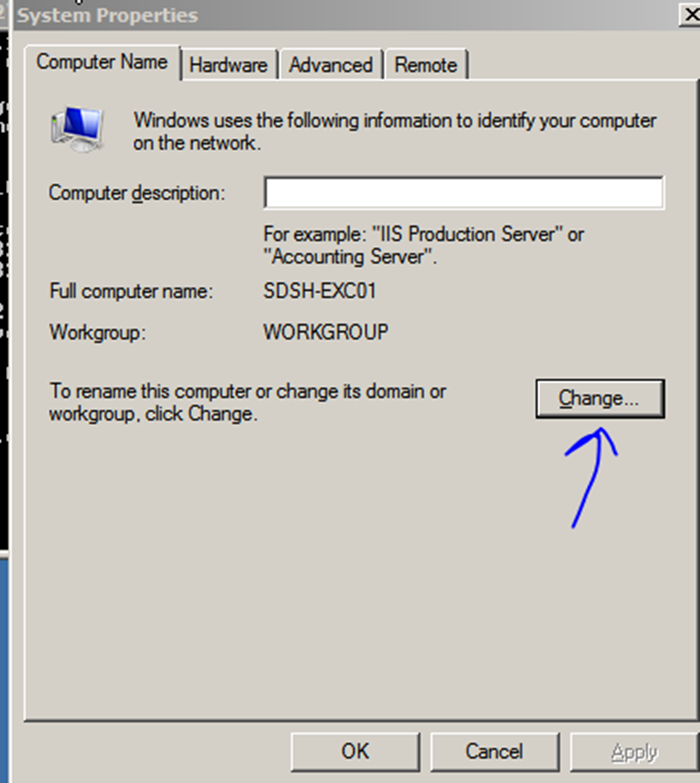
- Go to system properties and change the computer name.
- Type sysdm.cpl in RUN to open system properties
- Click on “change”.
Enter a computer name and click OK to save.
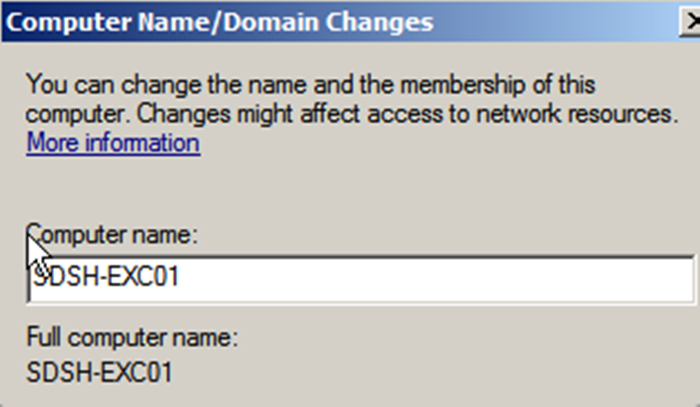
Reboot the system to apply the changes. Once rebooted, add the system into domain following below steps:
Go to Computer properties, click change:
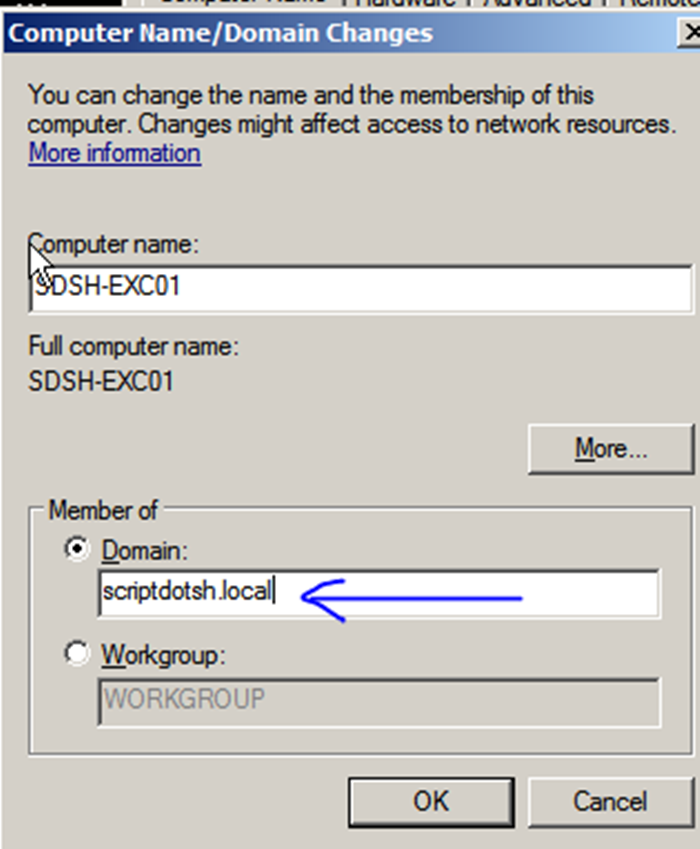
In domain under “Member of”, add domain name (eg/- in our case it is scriptdotsh.local).
bas-1.png Then press ok and enter an authenticated user’s credentials to add the system into domain. After reboot, your system is added into the domain.
DIY: – Create one or two client machines and add into the domain. You can play around by adding servers into the domain and install different services on those servers.
Who can add computers into domain: –
People enter Domain Administrator’s credentials while adding computer into domain because they generally don’t really know who exactly can add the system into domain. It is not required to enter administrator user’s credentials to add a computer into the domain. You can add any authenticated domain user’s credentials to add the computer into domain.
Default Setting:
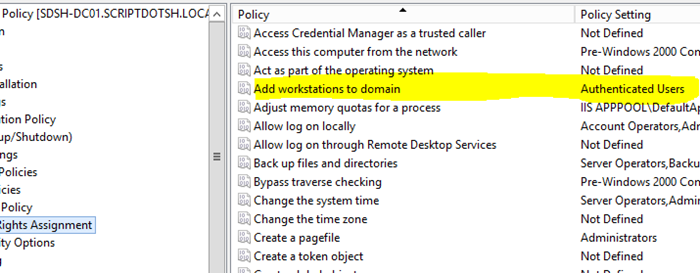
As per Microsoft, by default, you can use any authenticated domain user’s credentials to add the system into domain. Because there is a default setting which defines that “Authenticated Users” can join computers into domain. In the default policy, “Add workstation to the Domain” User Right is assigned to “Authenticated Users”. See below screenshot-
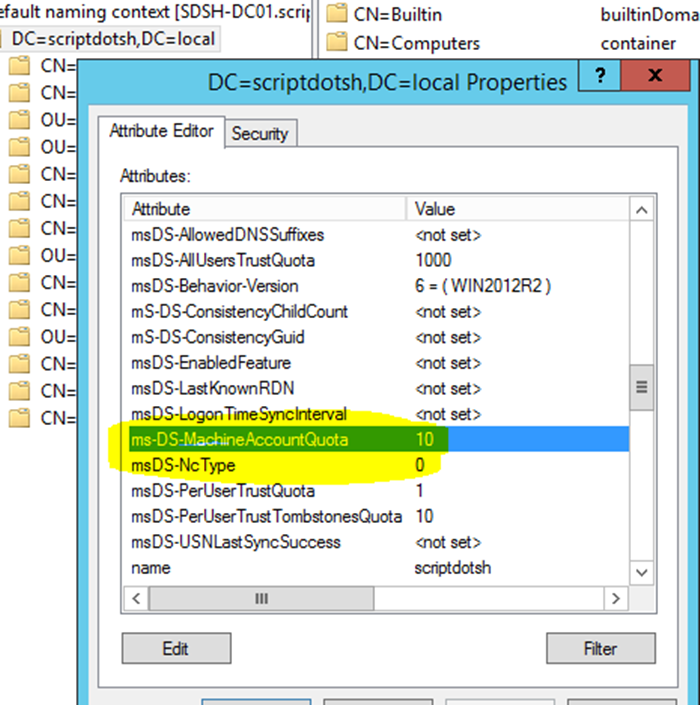
A domain user can add upto 10 systems in the domain.
This is because of an attribute called ms-DS-MachineAccountQuota. By default, it is set to 10. If we change it to 0, that will disable this limit.
Who should be able to add computers into domain?
This setting should be changed. If you don’t change this, any standard domain user would be able to join their machines to the domain. And If they do, they become Owner of the computer objects in AD (from ACL point of view) and additionally have ACCESS_CONTROL flag which means they can read confidential attributes for that object (for example LAPS passwords etc.). Delegation should be used instead of default setting.
Add users into Active Directory Domain:
In this section, we will learn how to add users in the domain.
GUI Way : –
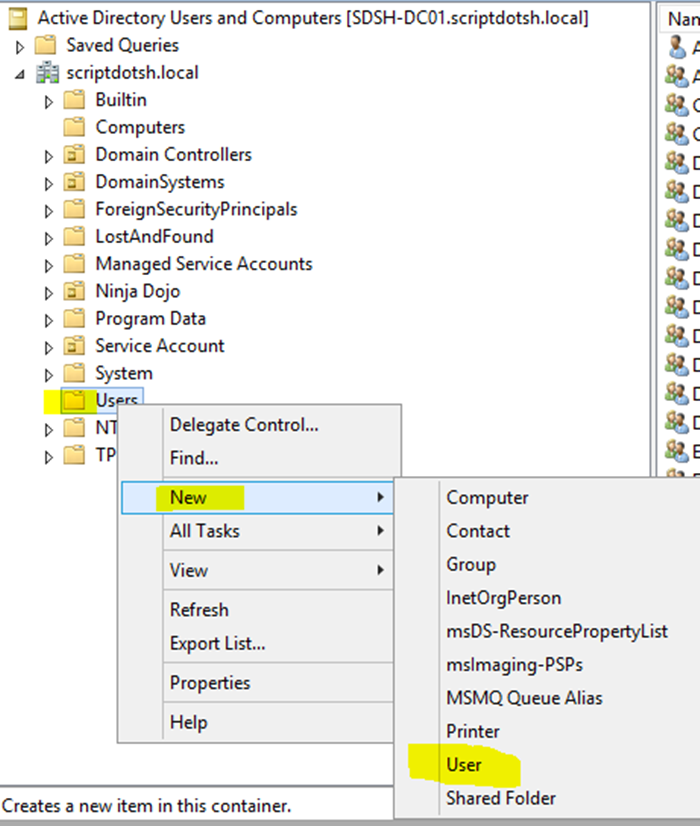
To create a user in the active directory, open Active Directory Users and Computers. (Type dsa.msc in RUN to open ADUC) Right click on the Users container and Click New>User.
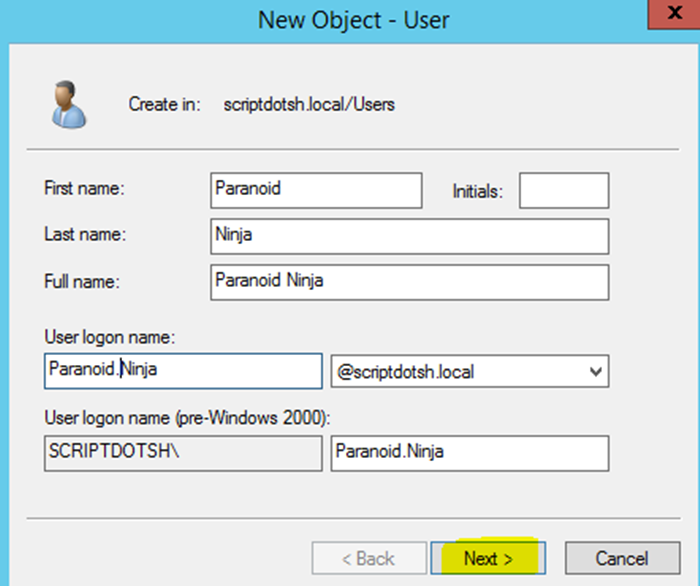
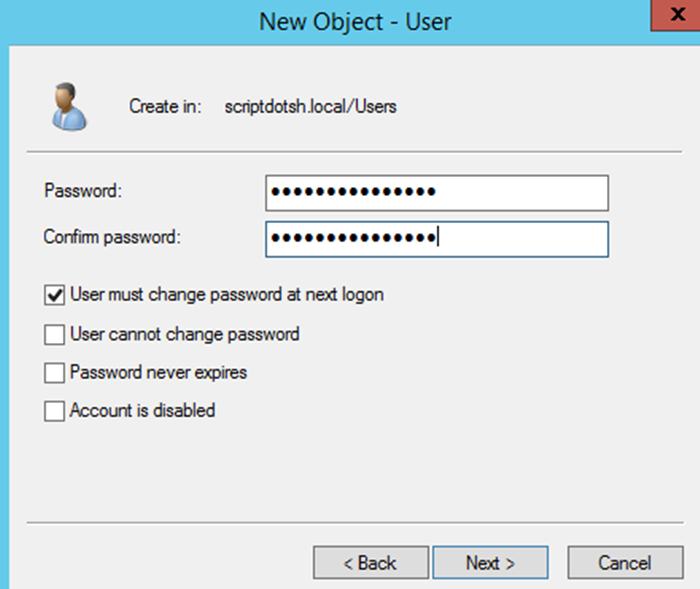
Fill in the details and click on Next.
Set a password for the user and click Next to finish.
CommandLine-Fu
Using CMD: –
Open command prompt as domain admin or a user who has permissions to create users and type the below command:
net user username password /add /domain
Using Powershell: –
Use the New-ADUser cmdlet, specify the required parameters, and set any additional property values like email, department etc.
New-ADUser -Name "Winsaaf Man" -DisplayName "Winsaaf Man" -SamAccountName “winsaaf.man” -UserPrincipalName “winsaaf.man@scriptdotsh.local” -GivenName “winsaaf” -Surname "man" -AccountPassword (Read-host -AsSecureString “Enter Password”) -Enabled $true -server scriptdotsh.local
You can also set more additional property values like below:
-ChangePasswordAtLogon $false
-PasswordNeverExpires $true
Learn about more flags in the Get-Help section of this cmdlet New-ADUser.
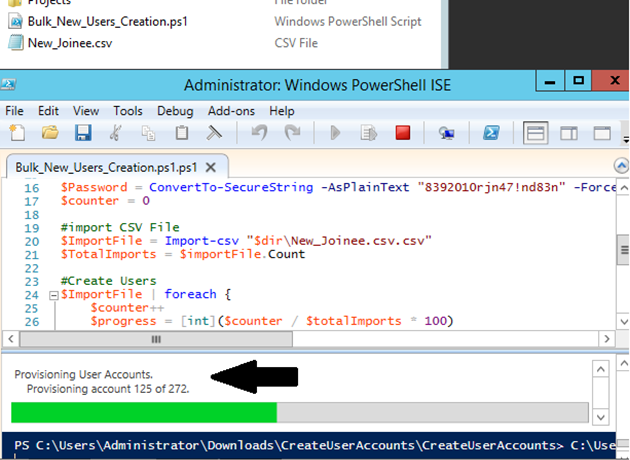
Add users in bulk: –
Import details of users from a CSV file using powershell script. When you run this script, it creates your multiple user accounts in the domain. Download the script and csv file from Microsoft’s site by visiting this link. See below:
DHCP Server
Dynamic Host Configuration Protocol server is required in AD environment to avoid the manual efforts of configuring each computer by entering a static IP and join into domain. If there is a DHCP server in the domain, all client machines get IP Address as well as DNS server information automatically. To install it, just install “DHCP Server” role from server manager. You also get a centralized management console to manage the DHCP clients. To open the console, Type dhcpmgmt.msc in run.
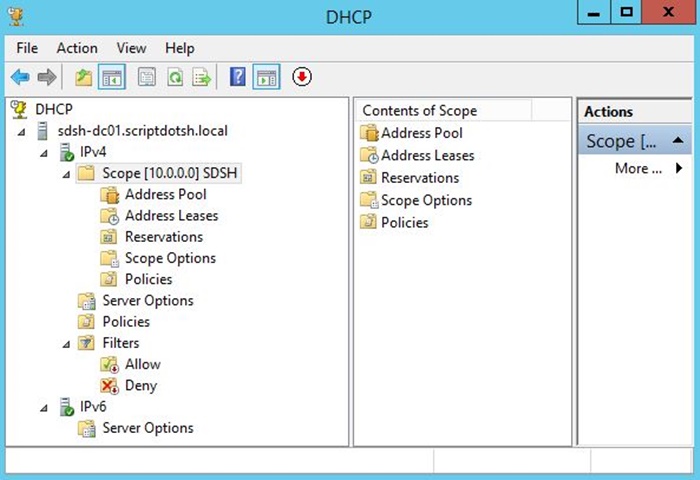
As our purpose is to setup a small AD environment to perform pentesting, and there are not much client machines, we can also skip DHCP setup and assign IP addresses manually.
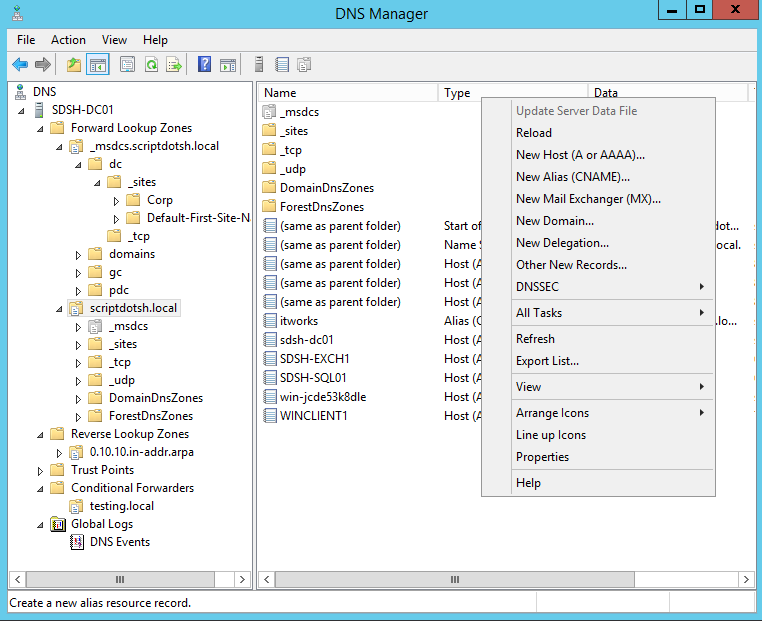
AD Integrated DNS Server Setup: –
DNS is the primary name resolution service for Active Directory. In the first post, while installing ADDC role in the domain controller, we checked the DNS role also, that installs the DNS server as well on the DC. This role could be installed by visiting the server manager and clicking on “Add Roles and Features” section. Select “DNS”. This will install DNS server role on your Domain Controller and it serves as the DNS server for your domain environment and called as the AD integrated DNS server. A secondary DNS server for load balancing could be added as well. To open the DNS manager, Type dnsmgmt.msc in RUN and you’ll get a windows similar like below:
In this post, we learnt basis of AD and the operations like how to create a domain controller, member servers in AD environment, how to add users & computers in the domains. In next part, I’ll explain the trust and the process of creation of trusts and we’ll abuse the trust in later posts.
Tagged with: active-directory blogs