Active Directory Penetration Dojo- Setup of AD Penetration Lab: Part 1
Posted on 09 Jun 2018 by Scarred Monk
The Prologue
Hello everyone, Welcome to the series of Active Directory Penetration Dojo. This series is for people who’ve used Windows but haven’t worked on Active Directory. This blog will be focusing primarily on understanding AD environment so that we can perform AD enumeration and simulate AD attacks as one would do when doing a Red Team Assessment.
Attacker’s Paradise, Administrator’s Hell
Before joining InfoSec domain, I used to work as a Windows L3 administrator. My job was to manage AD resources, servers and deal with group policies etc. When I came into the Information Security domain a few months back, I started seeing the AD from the view of Red team members who perform different AD attacks and bypass these policies. That motivated me to research more on using the AD resources in an offensive manner.
From this blog series, you will get to know AD from two different point of views i.e. as an Administrator who tries to add security policies to harden the environment and an attacker who tries to bypass that and uses the same policies to manipulate the environment. There are many things that lead to the compromise of AD, like misconfigured settings, poor maintenance procedures, and many other mistakes made by administrators which I learned over time.
This blog series may be little lengthy covering the ADDC setup and attacks, reason being to understand the concepts of Active Directory, we must first understand the basics. It’s gonna be more interesting after understanding how the things work and when we setup a Virtual lab to test out the different attacks.
Hello Windows!
Active Directory is Microsoft’s Directory service which acts as a centralised repository that holds all the data related to users, computers, servers, resources etc. of an organisation and it makes administration & management very easy for System administrators. Using AD, workstations can be updated, configured and maintained remotely. It is a single management interface that is accessible from anywhere on the network.
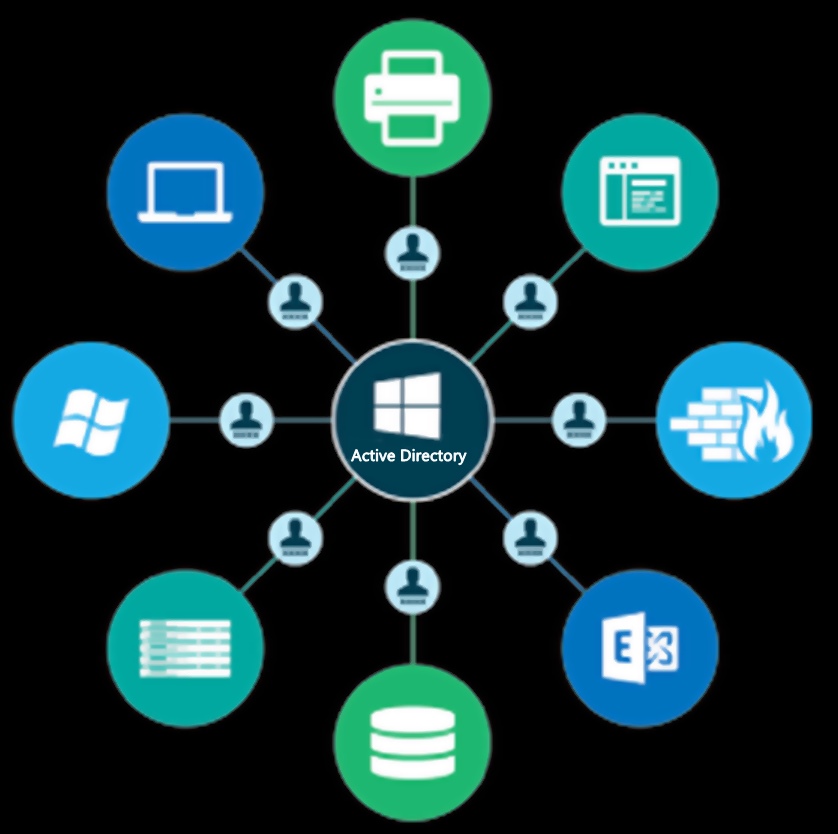
And this collection of all objects falls under a domain. Domains represent logical partitions within Active Directory for security and directory replication. A domain is always referred to by its unique name and has a proper domain name structure. (like- scriptdotsh.com)

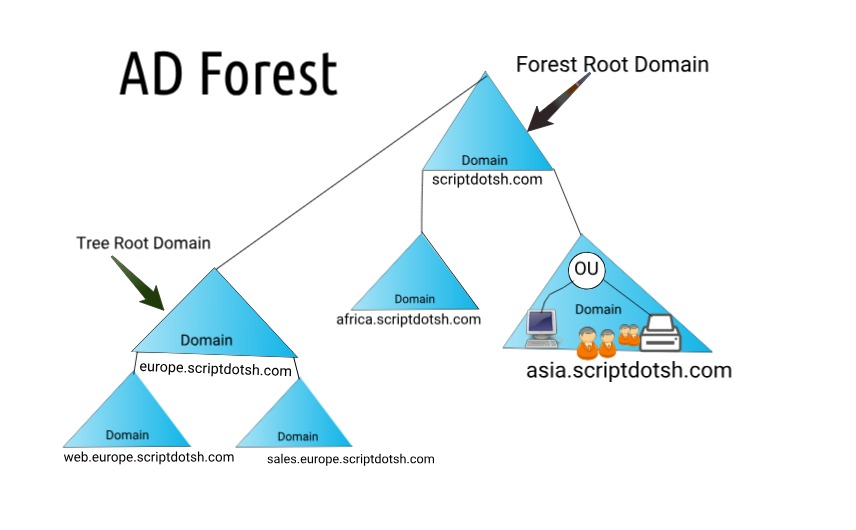
A group of AD domains that share a contiguous namespace is called AD Tree. Objects in tree always follow hierarchy. (Example: If in AD Forest scriptdotsh.com, computer1 is in its child domain europe, its FQDN (fully qualified domain name) would be: computer1.europe.scriptdotsh.com
And a collection of domain trees is called a Forest. A domain is always a part of forest even if there is just a single domain. A forest is composed of one or more trees. Unlike a tree, a forest can contain several non-contiguous namespaces.
Active Directory Domain Controller
AD Domain Controllers host the service that authenticates user and computer accounts when they log on to the domain, so all users and computers must connect to AD DS domain controllers when signing into the network, that’s why AD DS is the primary means by which you can configure/manage user and computer accounts on your network. In corporate environment with big infra and lot of users, Microsoft Active Directory is quite famous.

Note: AD DS stands for “Active Directory Domain Services”
AD Database
The information on user identity, computers, groups, services and resources etc. is stored in Active Directory database which is made up of a single file named ntds.dit. By default, it is stored in the %SYSTEMROOT%\NTDS folder.
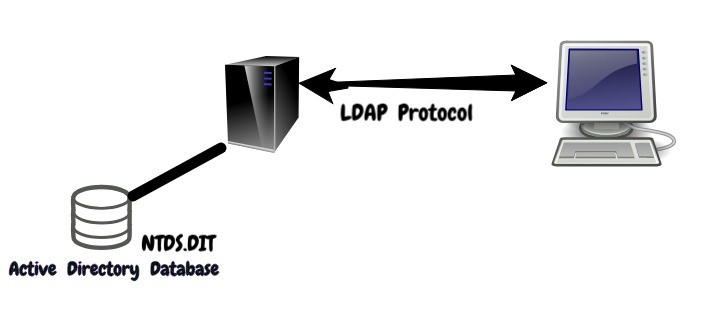
LDAP
LDAP stands for Lightweight Directory Access Protocol. This service is responsible for keeping track of what is on the network.
AD integrated DNS
DNS is important for Active Directory to work. There are several DNS records that AD requires to determine what services are available on the domain and who provides what. These records are managed automatically when you configure DNS in AD.
Kerberos
Kerberos is the services that allows you to use one username and password to log into multiple computers throughout the domain. It basically handles Single Sign On throughout the domain.
Group Policies
Group Policy is used to define user, security and networking policies at the machine level. Administrators can apply group policies from a centralized location to the whole domain or few computers/users. There are still many security professionals who aren’t very familiar with AD and many concepts of AD. So, I decided to discuss a few concepts of AD before explaining the setup part. Let’s get started with setup.
Active Directory Domain Controller Lab Setup
For this lab setup, I will setup a small environment because of limited resources but this environment is enough to simulate AD Attacks:
- Domain controller (Windows Server 2012 R2) In production environment, there are multiple domain controllers like ADC (Additional Domain Controller), RODC (Read-Only Domain controller), CDC (Child Domain Controller).
- Client machine (windows 7, windows 10)
- Member Servers like SQL server, File Server, FTP Server, IIS Server, Proxy Server, Antivirus Server etc.
We’ll discuss about two ways to set up the lab:
- Graphical User Interface way
- Command Line Interface way
The Administrator’s Way
Let’ get started with the first one. Download Oracle VirtualBox from here. Download the Server 2012 R2 ISO file which is evaluation version for 180 days which is good for testing from here. Note– Always download the evaluation copy of server OS ISO files from Microsoft’s website.
Creating a VM for Domain Controller
Hardware Requirements :
I will create the DC with the below configuration, which can be changed later:
- 1 vCPU
- 2GB RAM
- 25-30gb storage
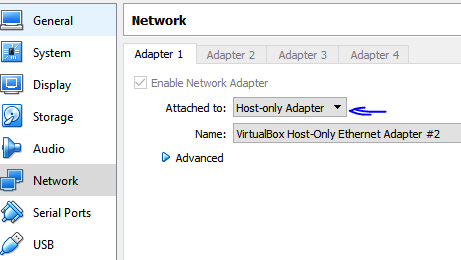
In VirtualBox, Select New Virtual Machine, enter the required details and click on Create. Remember, that your machines will be a part of host-only virtual network and will be segregated from the real environment but will be able to communicate with each other. To set this up, follow the steps:
- Right click your newly created VM and select “Settings”
- Go to Network and select “Host-Only network”.
I’m setting internal network so that only DC and Proxy server gets access to internet. Other clients will access internet via proxy server so we could gather logs as well.
I will also set up another NAT adapter later for internet access. For now, let’s configure only one adapter (Host-Only). Click to run it and browse the ISO file. It’ll boot and come up with normal steps to install windows. Click “Install now” and select partition and begin installation. Once installation finishes, power on the machine and assign a static IP address to it. That will be the address of your AD domain controller and DNS.
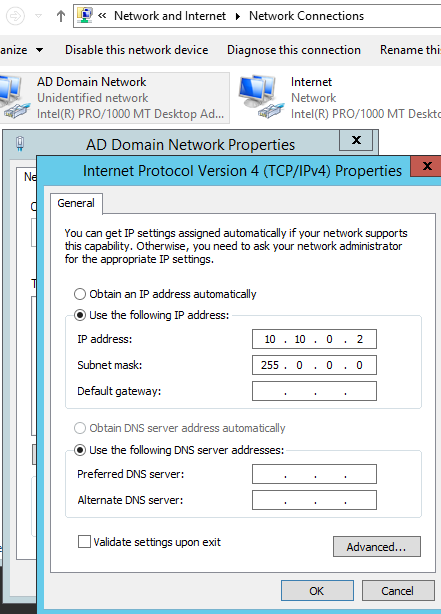
Assign an IP address:
Go to network properties to assign IP to the machine. Type ncpa.cpl in RUN to open network and sharing center. Assign a static IP address to the machine.
Change the computer name:
A meaningful name is required so that it’s easy to remember which server is DC, File Server, DHCP server etc. Go to system properties and change the computer name. Type sysdm.cpl in RUN to open system properties and change computer name.

Note:- Reboot machine to apply changes.
Installing the ADDS Role:
Go to Server Manager and click Add roles and features

Select the first option: – Role-based or feature-based installation

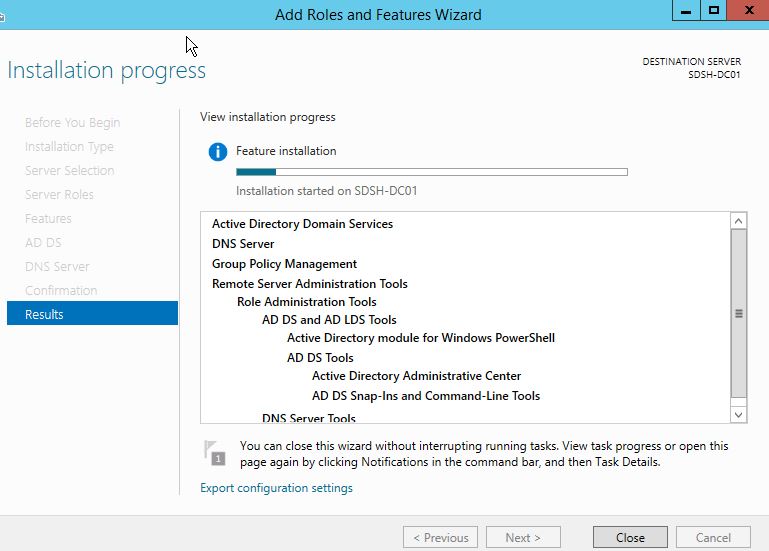
Click next until you reach the step to select roles. Select “Active Directory Domain Services” and click “Add Features” to the window that pops up. Click next.

Keep clicking “Next” until it installs roles and features. It takes some time to install the roles.
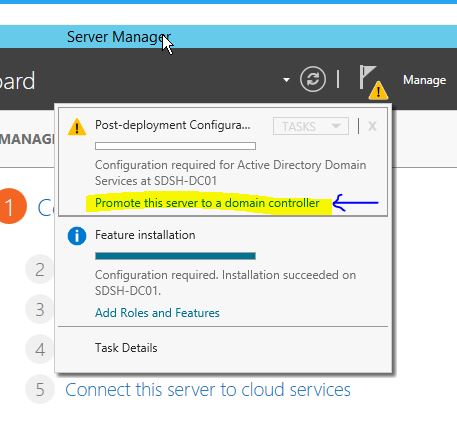
Promoting the Server to a Domain Controller
After the roles and features are installed, it will show below notification in the Server Manager. Click this to select the option to “Promote this Server to Domain Controller”
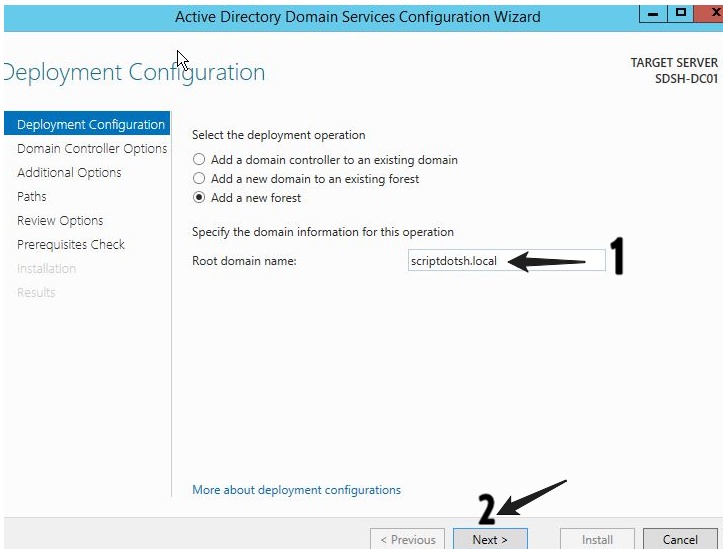
Add a new forest
Here, it shows an option to create a forest. Select “Add a New Forest” and enter a domain name. I named the forest as “scriptdotsh.local”
Click next. On the next screen, leave the defaults as it is and create a recovery password. This is called DSRM password (Directory Services Restore Mode). This password provides the administrator with a kind-of backdoor to the AD database in case there is some issue with the domain or when you need to restore/recover the AD database.
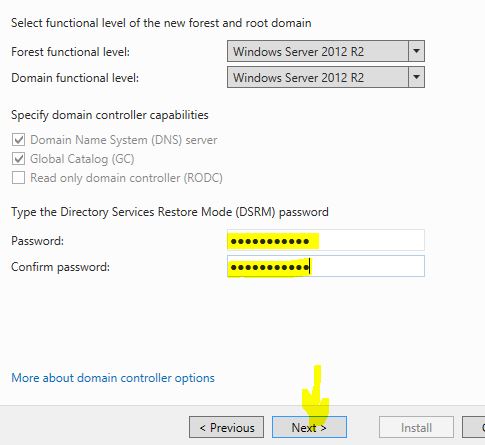
Just accept the defaults in the next series of prompts. It will check some pre-requisites and show some warnings, that’s Okay. Click “Install”. Now in the backend, installation and configuration of Active Directory and DNS will take place and then the server will reboot. After the reboot, your domain controller is ready! A logon screen will appear. You can log in using the same Administrator account. Please note that now the account is promoted to a Domain Administrator as the computer is a Domain Controller now. Below is the format for login:
Username - scriptdotsh\Administrator Password - XXXXXXXXX
CommandLine-Fu
In only 4 commands, you can set up the domain controller. In short, these 4 commands will do the same things that was explained above in GUI way. Run PowerShell as administrator and enter below commands:
Installing AD DS Role
Install-windowsFeature AD-Domain-Services

Installing ADDS RSAT features
Add-windowsfeature RSAT-ADDS

Promoting the Server to a Domain Controller
Import-Module ADDSDeployment
Note: There will be no output for this command as it is just to import the module.
Add a new forest
Install-ADDSForest
Enter the domain name and password and select “Yes” to continue.
AD Domain forest “scriptdotsh.local” is being installed:

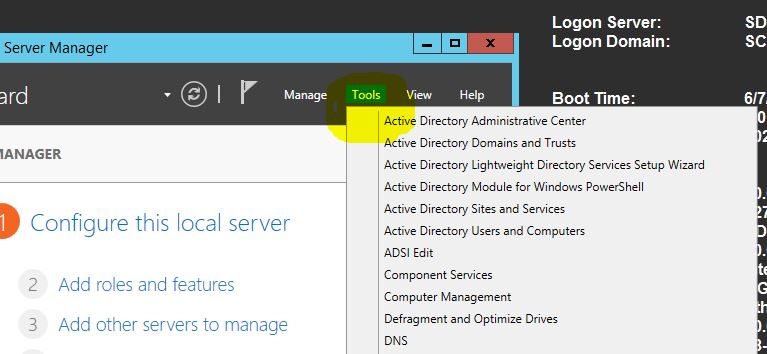
It takes a few minutes to complete the operation and then the server will reboot. After reboot, your domain controller is ready! Login in same way as shown in above GUI section. Once you’re in, you can explore different AD tools.
Epilogue
I believe this would be it for the first blog post. In the next post, I will populate AD with DNS, DHCP server, member servers, client machines, domain users etc. And after that, I will start with recon, exploiting misconfigurations and DC based attacks and hunts. Do comment below if you have any doubt :). You’re welcome to provide any suggestions to add into this series. Stay tuned for coming blogs 🙂
Tagged with: active-directory blogs