Ground Zero: Part 2-3 – Reverse Engineering – Building Cracked Binaries – Windows x64
Posted on 09 Jun 2018 by Paranoid Ninja
Prologue
In the previous post, we saw how to extract cleartext and encrypted passwords by reverse engineering the binaries which stored the passwords in memory or within the binary itself. But what if the password is not at all stored in the memory? What if the password is communicating to a random website over the network and sends the password over there for verification. We all like to use pirated softwares since we don’t have to pay for that. But there is always a chance of someone modifying the cracked exe to make it malicious. What if you could build your own executable by modifying the application’s binary and never have to use any other cracked executable anymore? Yes, that’s what we are going to look at today.
So, before wasting anymore time, here is the source code and the compiled binary. If you are downloading the source code, you can compile it using the compile.bat file in the above repo or by using the below command:
PS C:\Users\Paranoid Ninja\Desktop> g++ CrackMe.cpp -lws2_32 -static-libstdc++ -static-libgcc -o .\CrackMe.exe -m64
Remember, that the g++ I used is the 64 bit version of g++ and not the usual mingw32 bit g++ one. In the above repo there is a file named Server.py which is written in python3. So, here is how it goes.
Running the server, starts a listener on port 8080. It listens for any incoming connections. This is our virtual server where our binary will connect. Once, we execute our binary with our password, it will send the binary to the server. The verification of the binary is done at the server level and it returns whether the password is right or not. So, no matter what we do, we cannot find any password in the memory.
So, how to crack then? Let’s see. Here is how it looks when I enter the wrong password:
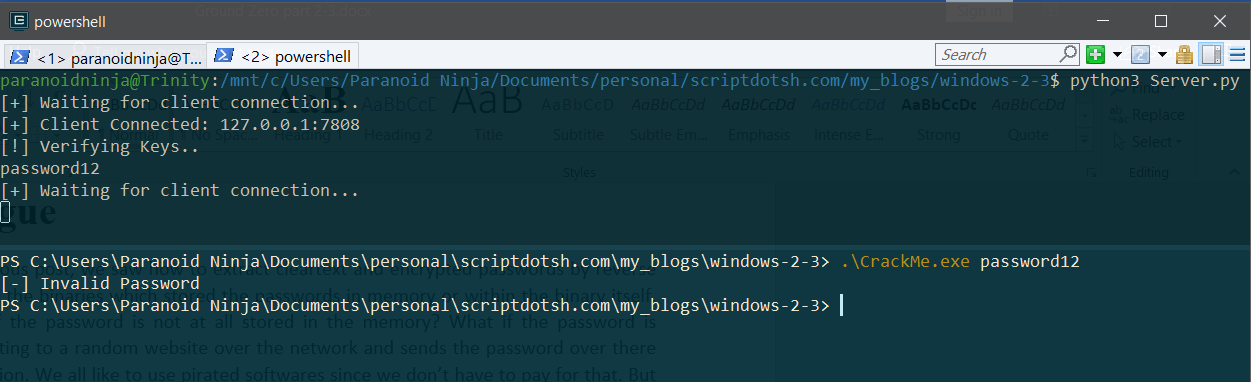
And even if you execute this binary without running the server, it will still give you the same result since it is unable to communicate with the server. Now, let’s load this up in x64dbg, and see how it works.
Disassembly

Once, its been loaded up in x64dbg, we will first go ahead and disable the system breakpoints. The main reason being we just want to analyse the binary now, and not the system DLLs that are preloaded before the program starts. We can do that by going to Options -> Preferences -> Events
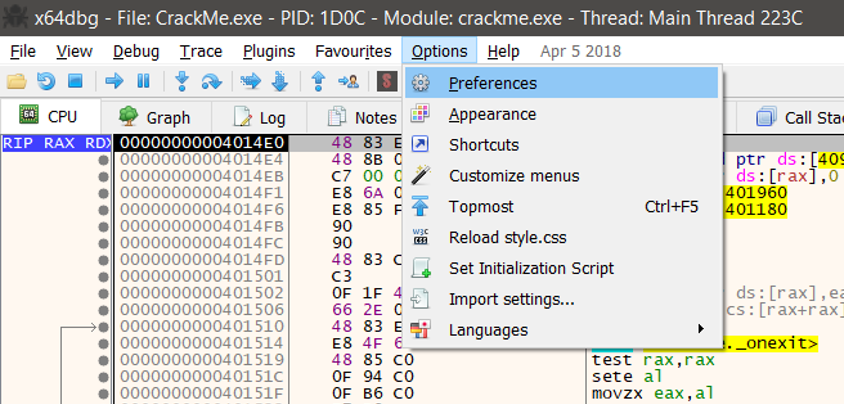
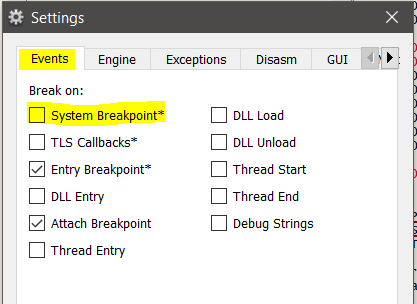
And then disable the System Breakpoint here. For the time being I will just keep the Entry breakpoint i.e. the Entrypoint of our program and Attach breakpoint i.e. where we set our custom breakpoints. Now, to make our life easier, we will start to use the main features of our debugger. We will first try to find the different set of functions in our binary. Secondly, we will enable description of what each instruction does. To do this, we will first right click on our Entrypoint, -> Select Analysis -> Select Analyze Module
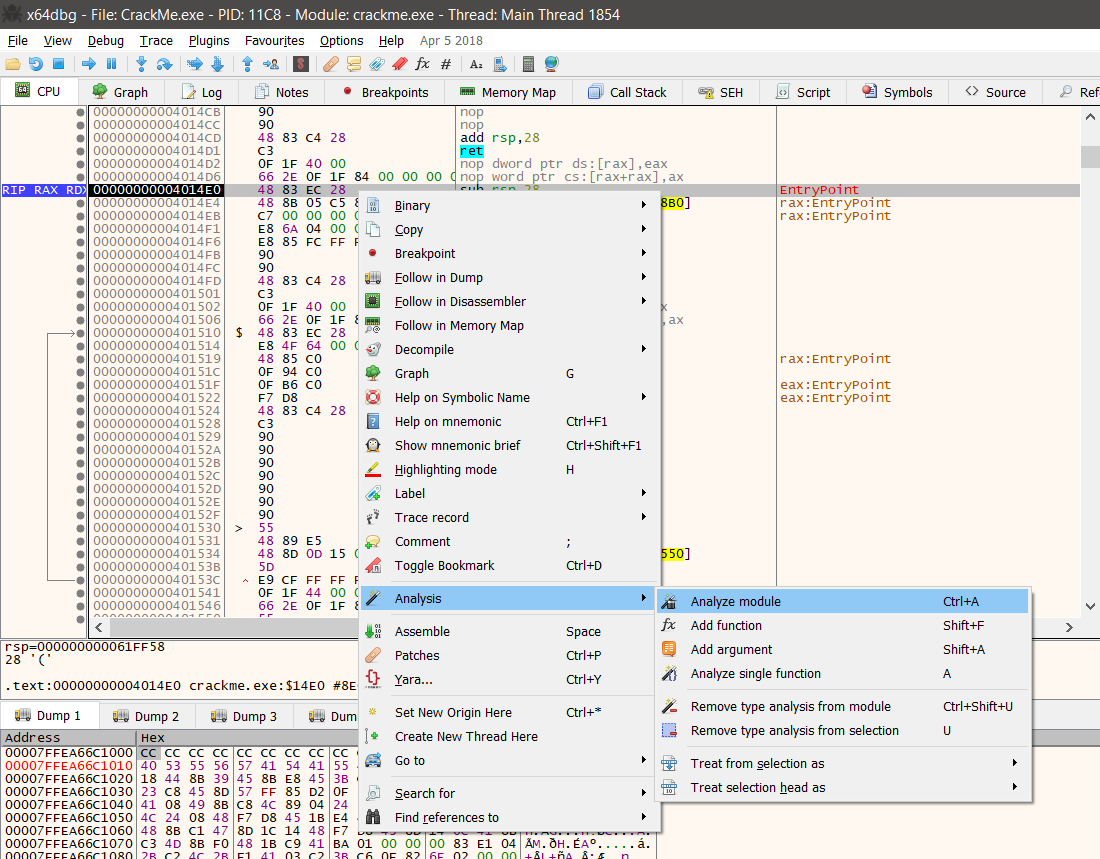
After doing this, you should be able to see brackets like this [ in the 2nd row. This will just show where a function starts and stops. The next thing is to enable description of the assembly instructions. If you look at the above screenshot above, you will see Show mnemonic brief 5 lines above the Analysis part. Just click this and it will enable the description of what each instruction is doing in the 5th column. Great! Isn’t it? We can even go to the Symbols Tab above and see which DLLs are required for the program to run:
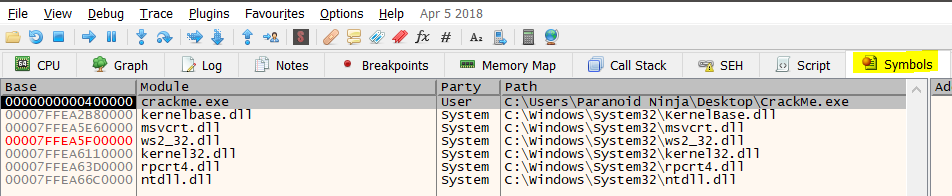
The main interesting DLL here is ws2_32.dll which is used by windows to connect to sockets. Having this DLL simply means your binary will be connecting over the network for some or the other reason. Enough with the beautifications, let’s start reverse engineering the main code of the binary.
First things first, we will right click our Entrypoint, and search for String references like we did in the previous blogs [Right click -> Search For -> All Modules -> String References]. Over here, we can see a few strings like 127.0.0.1, Valid, Help statement, Invalid key statement and so on. We will just right click 127.0.0.1 and follow it in the disassembler. Remember that this value is the IP address of our python server. In real life scenarios, this will be a URL and there will be certificate verifications and encryptions before the password is sent, and even those can be reverse engineered. But that’s for some other day.
So coming back to our disassembler, we are now into a new function here:

From what we can see here above, if we roughly try to analyse the disassembled code, we see that the code runs in this manner:
- WSAStartup [0000000000401596]: WSAStartup is a windows function which initializes the winsock dlls to load sockets. More info can be found here.
- Socket [00000000004015AF]: Socket function is being called which starts loading up sockets with multiple arguments. The arguments basically consist of the type of sockets used i.e. whether its TCP or UDP. And the child and parent socket to send and receive data over the sockets.
- Inet_addr [00000000004015CC]: This is where the inet is loaded i.e. whether its IPv4 or IPv6. IPv4 is specified as AF_INET and IPv6 is specified by using AF_INET6
- Htons [00000000004015DD]: A quick google shows that htons is used to convert a Port Number to network byte order. So, this should show us on which port is our binary communicating. More info can be found here.
- Connect [00000000004015FE]: Connect is a Windows function to use all the above data to connect to the remote server
- Send [0000000000401632] and Recv [0000000000401658]: These two parts look interesting. This is where our binary might be sending out some data and waits for a reply from the remote server.
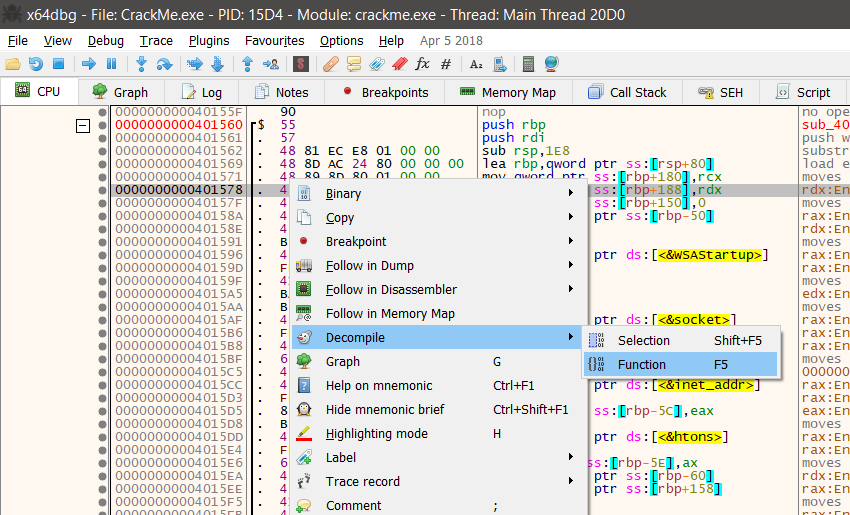
So, the above is just a hypothesis we created from the way the code looks like right now. Let’s try to prove that our theory is right. We will just right click anywhere in the function above and then Select Decompile -> Select Function. In short, we are decompiling this assembly code into a C++ code so as to make it easier to understand.
Once done, it will take you to a new tab named as Snowman. Here, you can find the disassembled assembly code on the left column and our decompiled C++ code on the right side. Let’s search for the string 127.0.0.1 here.
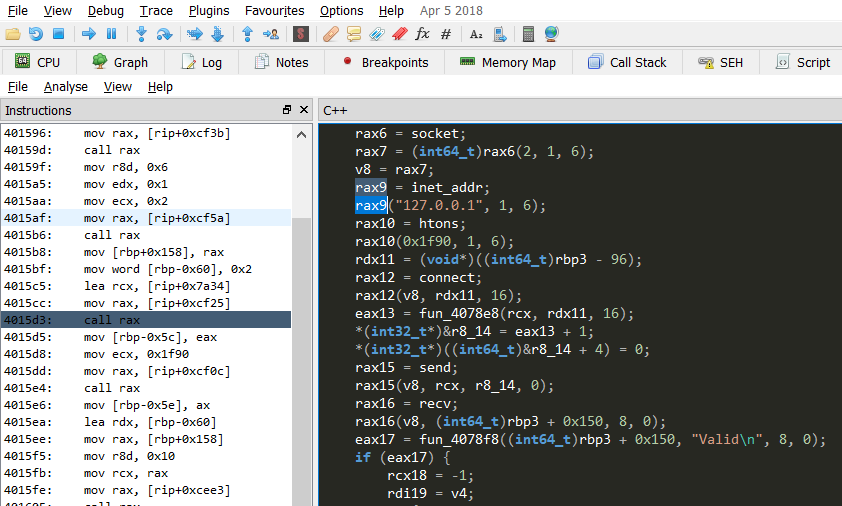
As you can see above, the line below the 127.0.0.1 loads up htons in the rax10. In the next line, we see rax10 loads up an argument 0x1f90. Remember that this value is in hex. If I convert this from hex to decimal, let’s see what we get.

I used python to convert hex to string and it shows that the port used here is 8080. Now, if you look at the previous screenshot where the htons was loaded, a few lines below that we can see that connect, send and recv functions are loaded in rax12, rax15, rax16.

If you look at the highlighted code above, the register rax16 loads up the function recv. The next line executes the same function with some arguments. The main arguments here are (int64_t)rbp3+0x150 and 8. Let’s take a look at the window’s recv function from the official website now.
int recv(SOCKET, char *buf, len, flags );
So, if you go back and look at the rax16 now, it loads up the same recv function where your char *buf is (int64_t)rbp3+0x150 and the len is 8. Now this is pretty important because the rbp3+0x150 variable holds the value which is received from the server and the length of this buffer is 8. In the next step, something is happening between the value received over socket which is in rbp3+0x150 and a string “Valid\n” and the final value returned from the function fun_4078f8 is stored into eax17. Remember that this function fun_4078f8 was defined at the start of this decompiled C++ code in snowman tab. After this, there is some if-else condition being executed, and then the main function ends up with closesocket and WSACleanup functions in rax24 and rax25, which shuts down the socket and returns to the previous function.
Now that we know how this works, let’s go to the main assembly code and find out what’s being sent over the network, what’s being received and what is being compared in the if-else condition. Let’s setup a breakpoint just before the &send function at 000000000040162F and see what is being passed on to this function.

A quick look at the RDX register shows that the password we entered when executing this binary is being passed to the send function which will be sent over the network. We will now go ahead and set up another breakpoint at 0000000000401668 which is just 2 lines after the recv function and see what is being received from server.

As you can see we received a text as Invalid which was loaded into the RAX register at 0000000000401661, just one instruction above our breakpoint. And in this step, the string “Valid\n” is being loaded into the RDX register, which will later be compared using the strcmp at 0000000000401672, and the return value of strcmp will be compared in the eax registers using the test instruction at 0000000000401677. So, it means our hypothesis was correct. This strcmp is nothing but the fun_4078f8 function we saw previously in the Snowman tab. In the next instruction i.e. at 0000000000401679, you will see that the instruction doesn’t set the Zero flag since the strings compared previously didn’t match and the instruction will now jump to 00000000004016D2. Now if you continue running the binary till 0000000000401723, you will see that a string “[-] Invalid Password” will be loaded into the RAX register.

Now, if you continue to run the binary, it will end the program after printing “[-] Invalid Password” to the screen.
Lesson Learnt
So, what did we learn here?
- We learnt that there is no password received from the server, and thus there is nothing that can be extracted from the binary.
- We don’t know what the server replies when we send it a correct password, because we don’t know the correct password itself.
- Also, even if we are able to modify the instruction somehow, we will still have to run the binary everytime with the debugger, since we don’t know the actual password, and we will have to modify the instruction everytime I wan’t to run the binary. This can be a headache, if you want to crack a game or a software.
So, the final solution we have is to modify the binary and then store the binary as a new file with the modified instruction. This modified instruction is called as a patch in reverse engineering. Let’s recall the binary and analyze where we can modify the instructions. There are two places here where this can be done [Highlighted Addresses below].
- The primary place is where the values are being loaded just before the strcmp comparison at 0000000000401661.
- The second place is after the values are compared where it checks if the Zero flag is set at 0000000000401679. This flag is not set if the values don’t match. So, here we can just increment the flag by one and continue running the process and it will print as correct password.

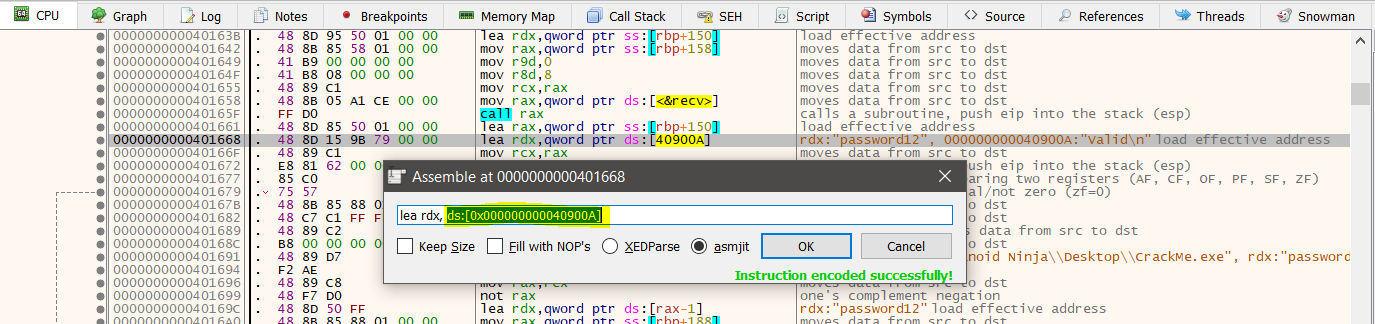
As for me, I will be using the primary method, but however you can try to use the second method as well. So, here I will be modifying the value at 0000000000401661 from ss:[rbp+150] to ds:[40900A]. The reason being this value i.e. ss:[rbp+150] is being loaded into rax and is being compared to ds:[40900a] which is stored in rdx. In the next step both of these registers are being compared. So, if I change the value of ss:[rbp+150] to ds:[40900A], then it will move the value at ds:[40900A] location to the rax register, and then it will compare ds:[40900A] to ds:[40900A] which will obviously return true since the values loaded will the same. So let’s go ahead and change it now.
To modify the value, double click the instruction at 0000000000401668, copy the exact location and paste it into the location at 0000000000401661.
Copy this value:
And paste it here:
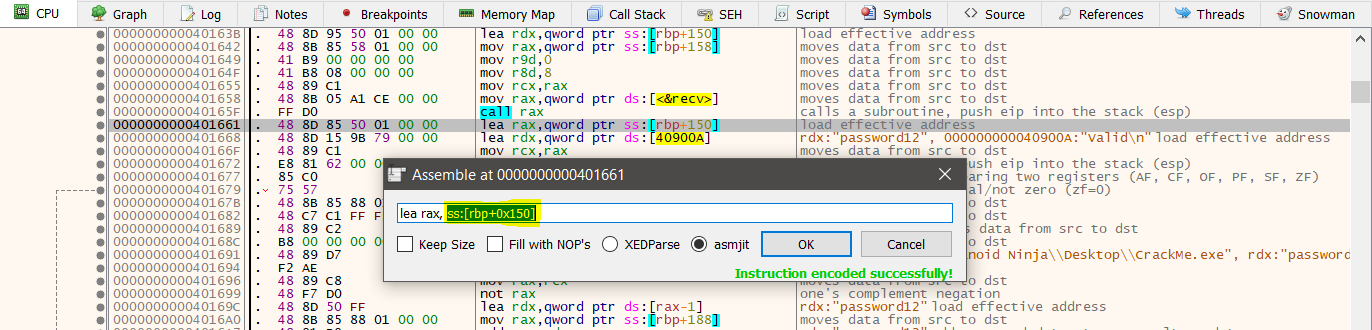
Now, the instructions should look like this:
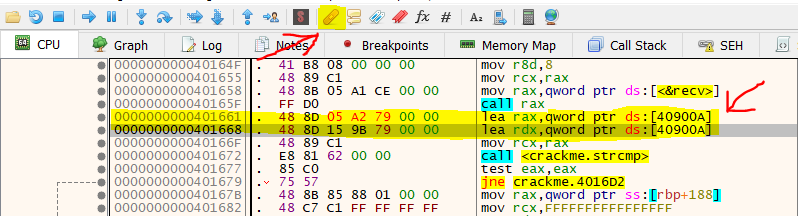
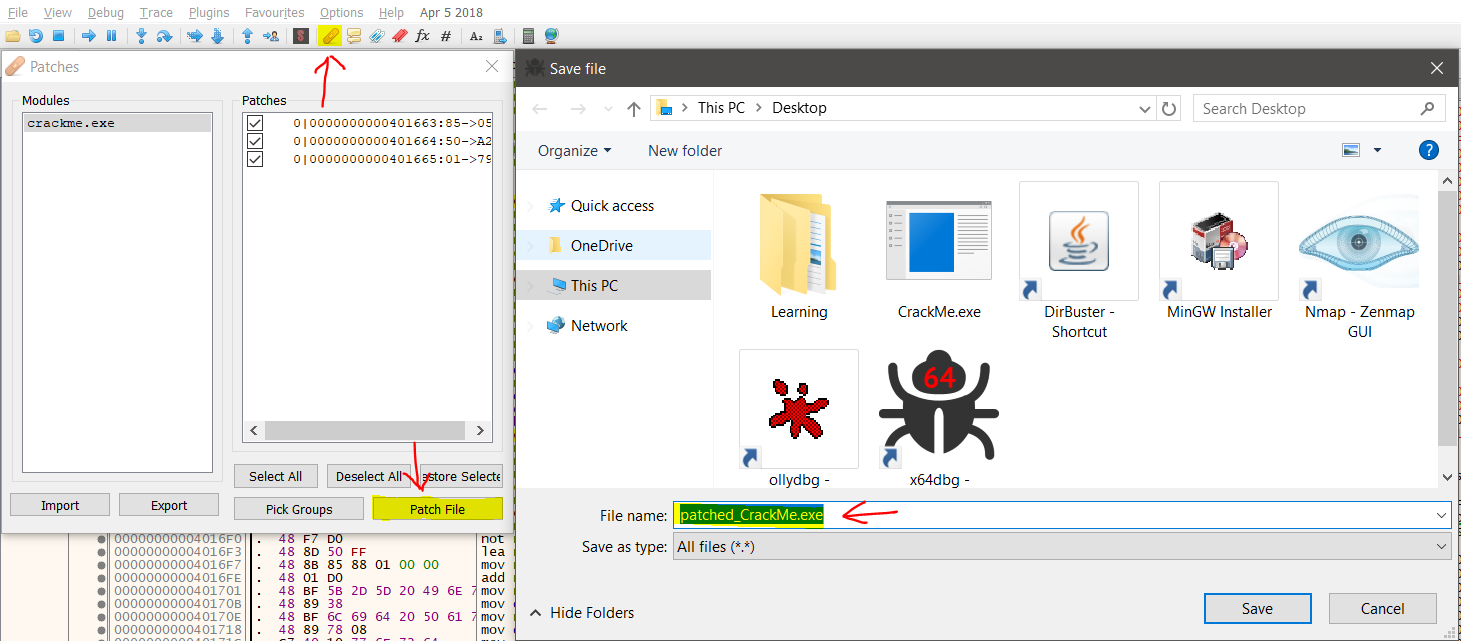
Since, the same locations are loaded into rax and rdx, the comparison will return true and it will print correct password now. Finally, just click on the patch icon, then click Patch File and save it as some exe as show in the screenshot below.
Epilogue
Once done, just continue running the binary. You will see that it prints correct password, and then close the debugger. Now, let’s go ahead and run our patched binary that we just saved and see how it works with and without running the server.

You can go and check the python script now, and it will specify that the original password was strongpass. But now, irrespective of what password we enter, it will print Correct Password even if you run it without running the server. And finally, we have created our first cracked program.
Tagged with: reverse-engineering blogs